Given that the main way users enter text in your Windows Phone 7 Series application is via a tiny onscreen keyboard (a “Software Input Panel” or SIP) it’s in everyone’s best interest to make sure the right keys are available to the user when they need them.
A good example is when you go to enter a PIN number you really only want to see number-related keys, when composing a SMS you’d like a quick way to insert an emoticon and if writing something longer you probably want auto-correction and replacement suggestions. The good news for Windows Phone developers is you can control which SIP layout is used and which auto-correct settings are enabled by setting the InputScope property of your TextBox.
The concept of InputScope isn’t new to XAML by the way, this concept already exists in WPF and was a nice fit with the native SIP behavior so if you’ve used InputScope before you should be right at home.
Setting InputScope
There are really three ways to set InputScope, two of which are cumbersome yet provide Intellisense and a third that is easy but requires you to know exactly which InputScope you’re after.
Via XAML
Doing it this way you’ll get full Intellisense yet it’s a lot of work to set a simple property:
<TextBox>
    <TextBox.InputScope>
        <InputScope>
            <InputScopeName NameValue="Text" />
        </InputScope>
    </TextBox.InputScope>
</TextBox>
Via Code
If you’re more the code-behind sort here it is in C#:
textBox1.InputScope = new InputScope()
{
    Names = { new InputScopeName() { NameValue = InputScopeNameValue.Text } }
};
Via XAML with a TypeConvertor
Remember how in high school they’d always teach you the hard way before showing you the easy version? Guilty as charged. If you already know the exact InputScopeNameValue you want to use, for example ‘Text’, then you can take advantage of the built-in TypeConvertor that is already wired up to the property and write this much easier XAML:
<TextBox InputScope="Text" />
InputScope Example Application
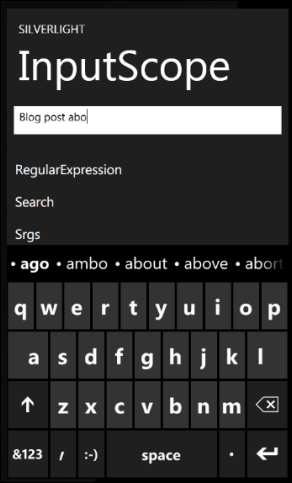
When we were bringing InputScopes from WPF to Silverlight for Windows Phone I wrote a quick app to show all the available InputScopes and automatically set the selected one on a TextBox. This gives you a feel for how many there are and what layout comes up when set. Here is what it looks like along with a link to the source:
Common InputScopes
Now that you know how to set them here are some of the more useful InputScopes:
| Default |
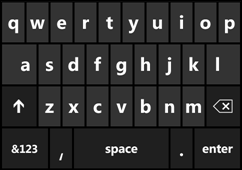
This is the default InputScope when no input scope is specified. Auto-capitalize first letter of sentence. The app can show app specific text suggestions. Layout: Standard QWERTY layout. |
|
| Number |
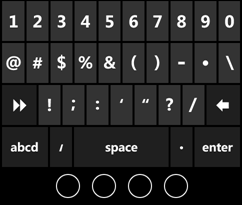
When all you’re looking for is basic number entry. All features like auto-capitalize are turned off. Layout: the first symbol page of the standard QWERTY layout. |
|
| Text |
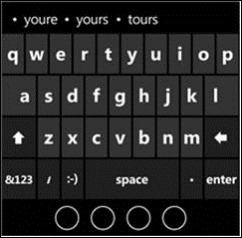
When the user is typing standard text and can benefit from the full range of typing intelligence features:
Layout: Text layout and access to letters, numbers, symbols and ASCII based emoticons + text suggestions. Example fields: email subject and body, OneNote notes, appointment subject and notes, Word document, etc. |
|
| Chat |
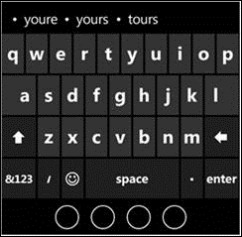
The user is expected to type text using standard words as well as slang and abbreviations and can benefit from some of the typing intelligence features:
Layout: Chat layout and access to letters, numbers, symbols and rich MSN like emoticons + text suggestions. Example fields: SMS, IM, Communicator, Twitter client, Facebook client, etc. |
|
| Url |
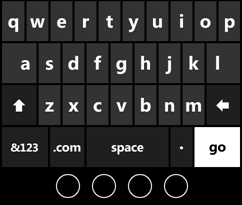
The user is expected to type a URL. All auto-correct features are turned off. Layout: Web layout with “.com” and “go” key |
|
For a complete list of InputScopes supported in Windows Phone 7 check out this MSDN link: InputScopeNameValue Enumeration.
In Conclusion
As you’re writing your applications don’t forget about InputScope, it’ll give it just that much more polish and can really make a difference in usability.